


Please note, that Redis is only available on our cPanel plans
The first thing to do is to navigate to Redis in cPanel:
Once within the Redis tool, enable it for your account:
Once enabled, copy the Redis socket path displayed in your cPanel account, as we will need this later! You can always come back to the Redis plugin screen within your cPanel account to see the path to your own Redis socket.
Please note that you must use the socket local to your account, which we create on this screen. You cannot use the socket for another account (or the one we show here!).
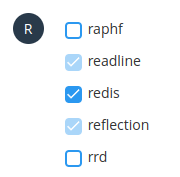
Now we need to enable the Redis extension; this is enabled under cPanel -> Select PHP Version -> Extensions -> Redis.
Once enabled, we can log in to WordPress and access the LiteSpeed Cache.
Under Cache -> Object, we can find the settings for enabling Redis:
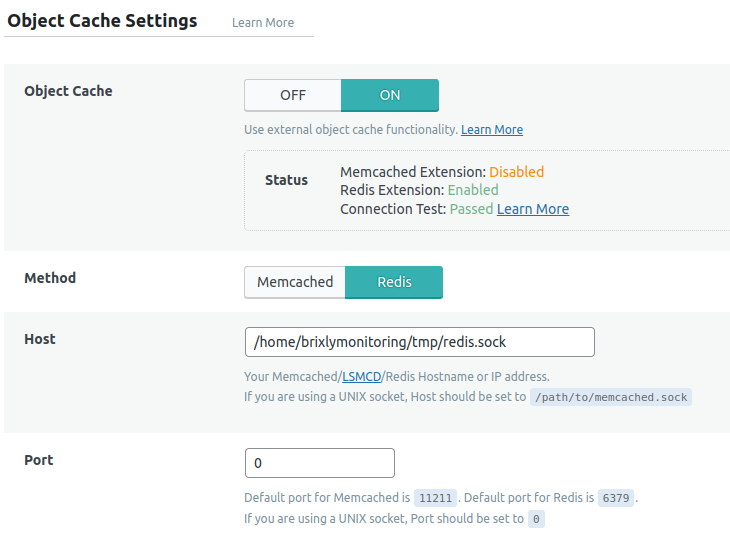
The settings we need to enable here are:
- Change Object Cache from Off to On
- Switch Method to Redis
- Set the Host to be the Redis socket path mentioned in the Redis plugin
- Change port to 0
Once done, hit save, and the Object Cache should be ready to go!